
REVIEW · KANDY TOURS
Kandy: Interactive Batik Workshop
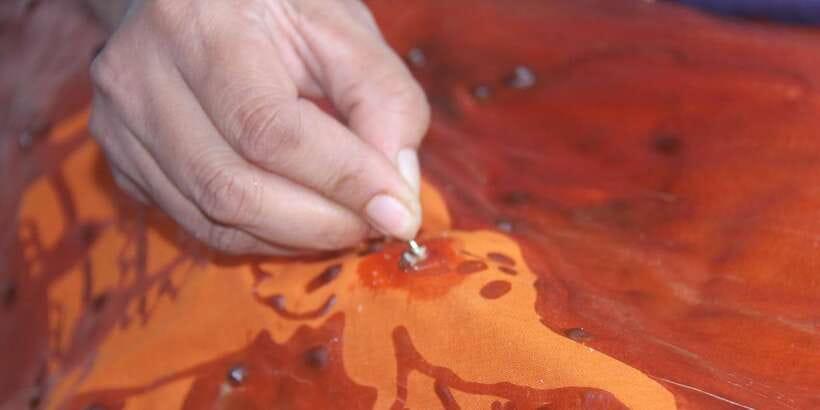
Batik happens in real time. In Kandy’s Ampitiya area, you create your own batik cloth while learning how wax resists dye through a full, hands-on process. It is a small, English-led workshop where you use the same basic tools and steps that keep this craft alive.
The main thing to plan for is finding the place. The studio address is 218/6 Thalapiyannawa Rd, Ampitiya, and it can be a little tricky for maps, so give yourself extra time and ask your driver for help.
In This Review
- Key Points You Will Care About
- Where This Workshop Fits in Kandy
- Arriving at the Studio in Ampitiya (And Getting There Without Stress)
- Your 3.5-Hour Batik Flow: What Happens Step by Step
- Picking Fabric and Learning Wax Mixtures
- Designing the Pattern With Wax Tools
- Wax Techniques That Actually Create Texture and Pattern
- Dyeing: Napthol, Vat, and Reactive Explained in Plain Terms
- Dewaxing: Wax Burning and Wax Boiling (The Finishing Moment)
- What You Take Home, and How to Make It Last
- Value for $28: Is It Worth the Time?
- Who This Workshop Suits Best (And Who Should Skip)
- Quick Tips to Get Better Results
- Should You Book This Kandy Batik Workshop?
- FAQ
- How long is the batik workshop in Kandy?
- What is included in the price?
- Is lunch included?
- Do I need to bring anything?
- Is the workshop taught in English?
- Is it suitable for everyone?
Key Points You Will Care About
- Small group, up to 10 people, so you get real guidance instead of watching from the sidelines
- Wax and dye techniques that actually connect, from drawing and waxing to coloring and removing wax
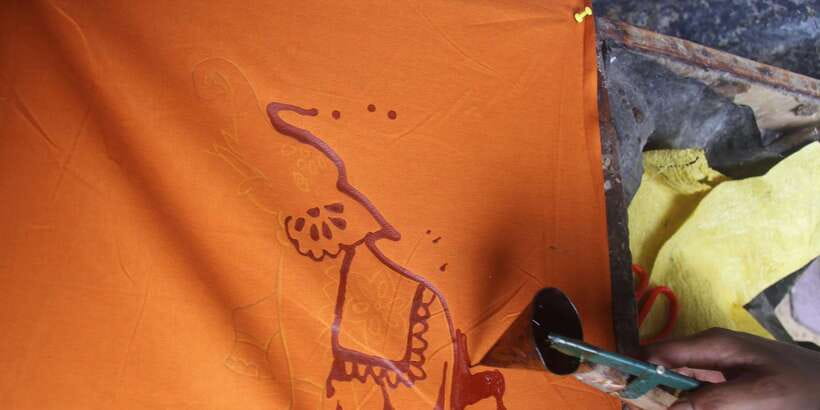
- Tools you get to use, including tjanting plus other batik-specific applicators like funnels and Henry-style tools
- Multiple pattern methods, such as stamping, cracking, spraying, and brush work with wax
- Napthol, vat, and reactive dye concepts, explained in a practical way so color makes sense
- You take home your finished piece, a tangible souvenir you made yourself
Kandy has more going on than one day allows
- Kandy Private Guided City Tour by Tuk Tuk
★ 4.9 · 1,307 reviews - From Kandy: Sigiriya Rock & Dambulla Cave Temple Adventure
★ 4.9 · 785 reviews - Kandy Village Cooking Class
★ 5.0 · 536 reviews - Kandy to Ella Train Tickets – Reserved Seats
★ 4.5 · 523 reviews
Where This Workshop Fits in Kandy
Kandy is lively, scenic, and sometimes chaotic. This workshop is the opposite vibe. For about 3.5 hours, you slow down and work with your hands in a calm, family-style setting in central Sri Lanka’s Central Province area.
Price is $28 per person for a 3.5-hour session, and that feels fair when you remember what you get included: tools, plus cloth, wax, and dyes for your own project, along with herbal tea. It also helps that the group stays small, limited to 10 participants, so you are not stuck waiting in line for attention.
One more detail worth noting: the studio is at 218/6 Thalapiyannawa Rd, Ampitiya. Transportation is not included, so you will want a tuk-tuk or your own ride arranged ahead.
Arriving at the Studio in Ampitiya (And Getting There Without Stress)
You meet at 218/6 Thalapiyannawa Rd, Ampitiya. That is the key line on your plan, but it may still take a few tries if your navigation app is not great at pinpointing small roads.
Here is how I would make your life easier. Confirm the meeting point with the operator before you go, then ask your tuk-tuk driver to wait while you walk a short distance to the right house or studio entrance. If the driver cannot find it, ask nearby neighbors for directions, not just the main street.
You should also build in a little buffer time. Even if you arrive early, it is a low-key start, so you are not rushing into the craft.
Your 3.5-Hour Batik Flow: What Happens Step by Step
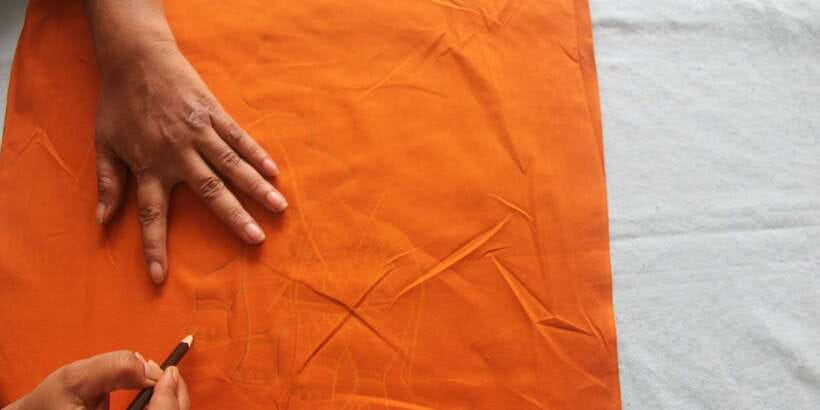
This is not a quick demo followed by a token craft. The session is structured as a full batik cycle, so you see why each step matters.
You start by selecting fabric, then move into wax mixture and waxing techniques. After that, you create your design using batik tools such as a funnel, tjanting, and a Henry tool (the workshop provides the equipment). Then you explore several wax-applied pattern methods, before moving into dyeing with different dye types. Finally, you finish with dewaxing, using wax burning and wax boiling processes.
Plan to stay focused, but do not worry if you are not artistic. The process is learnable, and the whole point is that you practice it with help.
Other workshops where you make something
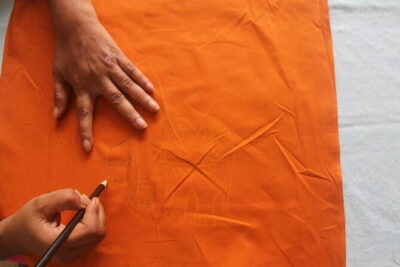
Picking Fabric and Learning Wax Mixtures
In batik, wax is your resistance tool. Wherever wax goes, dye has a hard time reaching the fabric beneath. That means your design is built in layers, and the choices you make early shape your final look.
After you arrive, you typically select your fabric, then learn how wax mixtures work and how to handle waxing. You will get guided instruction on the techniques and why they differ. That explanation helps you stop treating it like random pattern-making and start treating it like controlled design.
This is also where you get the right mindset: the first goal is understanding how wax behaves, not producing a perfect masterpiece.
Designing the Pattern With Wax Tools
Once you start creating your design, the workshop gets hands-on in a very satisfying way. You use tools like tjanting and other wax applicators, plus funnels and a Henry-style tool. The workshop encourages either a stencil-style approach or a fully creative design, depending on what you want to attempt.
Wax drawing feels slower than normal sketching, because the wax needs to apply cleanly. But that is part of the charm. You are learning a craft logic that has been used for generations.
You may also get inspiration from simple design ideas. Some participants even mention learning how to write their name in Sinhalese as part of a personal touch, which turns your cloth into a souvenir with meaning, not just decoration.
Wax Techniques That Actually Create Texture and Pattern
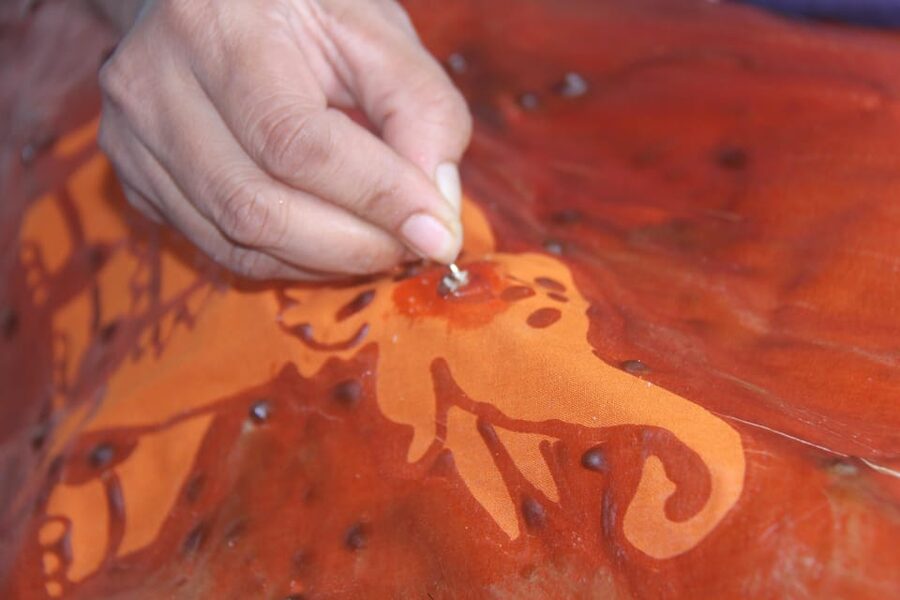
This workshop does a smart thing: it does not just teach one wax method. You get exposed to several pattern styles so you can mix techniques and build a look that feels intentional.
The techniques mentioned include wax spraying, stamping, cracking, brush arts, and wax designing. Each one gives a different texture to the final cloth, and the dye step will reveal those differences.
Here is the practical way to think about it. Spraying and brush work tend to create softer, more fluid effects. Stamping and more direct wax placements create bolder, sharper boundaries. Cracking effects happen because of how wax changes as it cools, so it gives you that naturally aged pattern look without you having to do more than apply wax correctly.
Even if you feel clumsy at first, that is normal. The instructors guide you, and you can usually fix mistakes by adjusting the next wax application rather than starting from zero.
Dyeing: Napthol, Vat, and Reactive Explained in Plain Terms
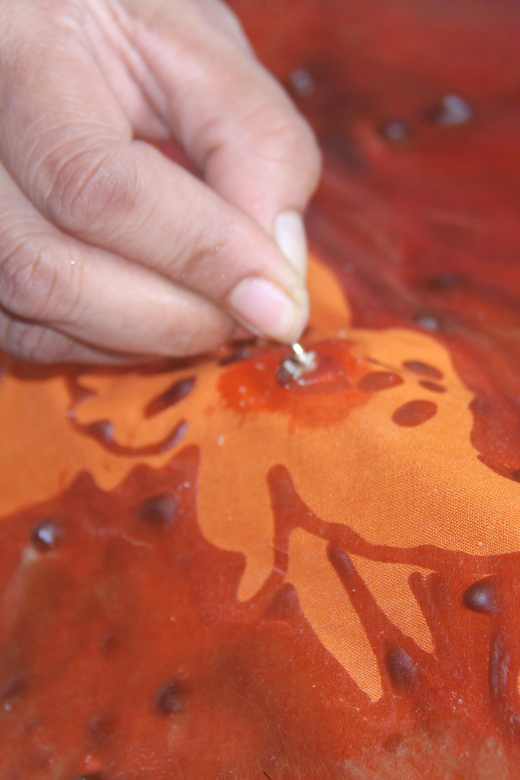
After waxing, the workshop shifts from line work to color logic. Dye is where your design becomes visible. The dye types mentioned are napthol dyes, vat dyes, and reactive dyes, plus information on dye mixtures and dye application techniques.
You do not need chemistry knowledge to enjoy this part. What matters is that dye behaves differently depending on the dye class and how it is prepared and applied. The workshop’s focus is on giving you a usable understanding, so you know why the instructions are the way they are.
You will learn basic dye mixtures and how to apply dye to your cloth. Then you watch your wax-resist areas hold their shape while the fabric without wax takes on color.
If you have ever wondered why batik looks so complex, this is the answer. It is not only the design you draw, it is the interaction between wax and dye under the right conditions.
Dewaxing: Wax Burning and Wax Boiling (The Finishing Moment)
The last act of batik is removing the wax so the pattern shows clearly. This workshop ends with learning about wax burning and wax boiling, also known as dewaxing.
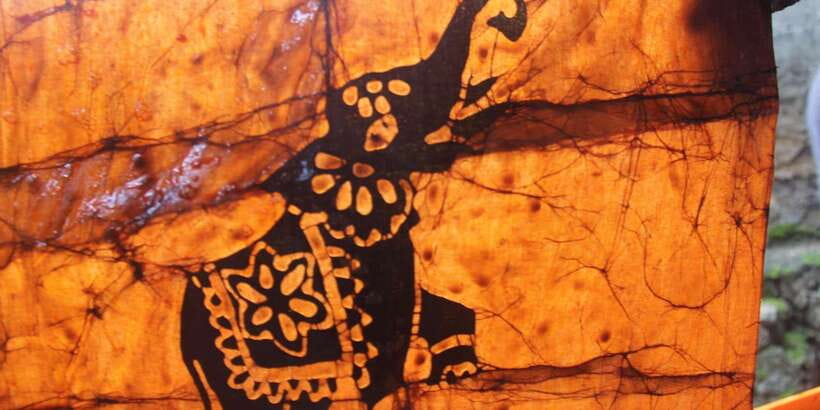
This is the moment when the project clicks. Until dewaxing, a lot of your work looks like “wax over fabric.” After dewaxing, your hidden spaces and resist lines appear, and you finally see whether your technique choices created the contrast you expected.
You should expect to observe how dewaxing is handled carefully. Wax removal is also part of why batik requires real process knowledge, not just art skills.
When it is done, you are left with a take-home piece that is truly yours, made from scratch through the steps instead of bought pre-made.
What You Take Home, and How to Make It Last
The workshop includes the cloth, wax, and dyes you need for your session, so you leave with a finished batik souvenir. For many people, the best part is that it is not a generic pattern. It is a design you made with your own decisions and hands.
Some participants also mention receiving care instructions after the workshop so their batik stays looking good at home. If that is offered to you, follow it closely. Wax-resist textiles can be sensitive if you treat them like regular cotton right away.
And if your finished cloth is destined for a frame, bag, or wall hanging, think about that before you rush off. You can plan how you will display it, but you do not need to overthink it during the workshop.
Value for $28: Is It Worth the Time?
At $28 for 3.5 hours, the value depends on what you want from a Kandy activity.
You get:
- Hands-on experience creating your own batik cloth
- All tools and equipment required for the session
- Cloth, wax, and dyes for your project
- Herbal tea
- English instruction and a small group limit of 10 participants
For me, the value comes from the full process. If you only did one technique, it would feel like a craft sampler. Here, the session covers designing with wax, applying dye types, and finishing with dewaxing. That is closer to a real skill experience, even if you are a beginner.
Also, the “interactive” part matters. You are not passively watching someone else work. You are doing the steps, with instructors guiding you.
Who This Workshop Suits Best (And Who Should Skip)
This batik workshop suits you if you want a calm, creative break from Kandy’s streets. It is also a good fit if you like learning how things work, not just taking photos of them. The pace is hands-on and focused on process.
It also works well even if you do not consider yourself artistic. Many people highlight that they were able to make something they were proud to take home, with help correcting mistakes along the way.
A couple of important notes:
- Comfortable clothes are recommended.
- Bringing a change of clothes might be useful in case paint or dye transfers onto what you wear.
- It is not suitable for pregnant women or people with back problems.
If you have any mobility concerns, ask the operator what the seating and standing setup is like before you book.
Quick Tips to Get Better Results
These are the small practical choices that help you enjoy the workshop more.
Wear comfortable clothes that you do not mind staining. Even with care, wax and dye work can be messy in the real world. If you can, wear sleeves that you feel safe working in and that you can manage without fuss.
Arrive with an idea, even if it is simple. A name, a floral motif, or geometric pattern can be a great starting point. If the instructor offers stencils, you can use them as a template, then adjust your design.
Finally, pace yourself during the waxing stages. If you try to rush, the wax application can get uneven. Slow and steady usually gives the cleaner resist lines.
Should You Book This Kandy Batik Workshop?
I think you should book if you want a hands-on craft in Kandy that turns into something personal you can take home. The workshop’s biggest strengths are the small group format, the full batik sequence from wax to dye to dewaxing, and the way the instructors guide you through tools and techniques like tjanting, wax spraying, stamping, and cracking.
I would skip or rethink it only if you are not comfortable with possible mess on clothing, or you need an activity that is fully accessible for pregnancy or back issues. Also, if finding the studio address is going to stress you out, arrange transport early so you do not lose time.
If you are open to creative work and like learning by doing, this is a smart use of a morning or afternoon in Kandy. You will come away with a piece of cloth that feels tied to the place, because you actually made it there.
FAQ
How long is the batik workshop in Kandy?
The duration is 3.5 hours.
What is included in the price?
The session includes hands-on experience making your own batik cloth, all tools and equipment, the cloth, wax and dyes needed for the session, and herbal tea.
Is lunch included?
Lunch is not included.
Do I need to bring anything?
Wear comfortable clothes. Bringing a change of clothes might be useful in case paint gets applied to what you are wearing.
Is the workshop taught in English?
Yes, the instructor speaks English.
Is it suitable for everyone?
It is not suitable for pregnant women or people with back problems.
More Tour Reviews in Kandy
Make Something to Take Home
Still in Kandy?
Still browsing Kandy? Start here
- Udawalawe National Park Private Full-Day Safari★ 5.0 · 3 reviews
- Wasgamuwa National Park Safari from Kandy★ 5.0 · 3 reviews
- Private Sri Lanka Tour & Hike Experience to Ambuluwawa Tower★ 5.0 · 3 reviews
- Kandy Instagram Tour: Most Famous Spots (Private & All-Inclusive)★ 5.0 · 3 reviews
- Kandy to Ella★ 5.0 · 3 reviews
Kandy Tours, compared.
 ★ 4.9Kandy Private Guided City Tour by Tuk TukFrom $61,307 reviews
 ★ 4.9From Kandy: Sigiriya Rock & Dambulla Cave Temple AdventureFrom $29785 reviews
 ★ 5.0Kandy Village Cooking ClassFrom $25536 reviews
 ★ 4.5Kandy to Ella Train Tickets – Reserved SeatsFrom $26523 reviews
 ★ 4.8From Kandy: Pinnawala Day TourFrom $15331 reviews
 ★ 4.8Kandy to Ambuluwawa & Kandy City Guided Tuk Tuk Day TourFrom $12270 reviews
 ★ 5.0Day tour to Sigiriya & Dambulla from KandyFrom $25252 reviews
 ★ 5.0Kandy to Sigiriya Day Tour and Dambulla cave temple with private vehicleFrom $42232 reviews
Browse the lists this tour appears in